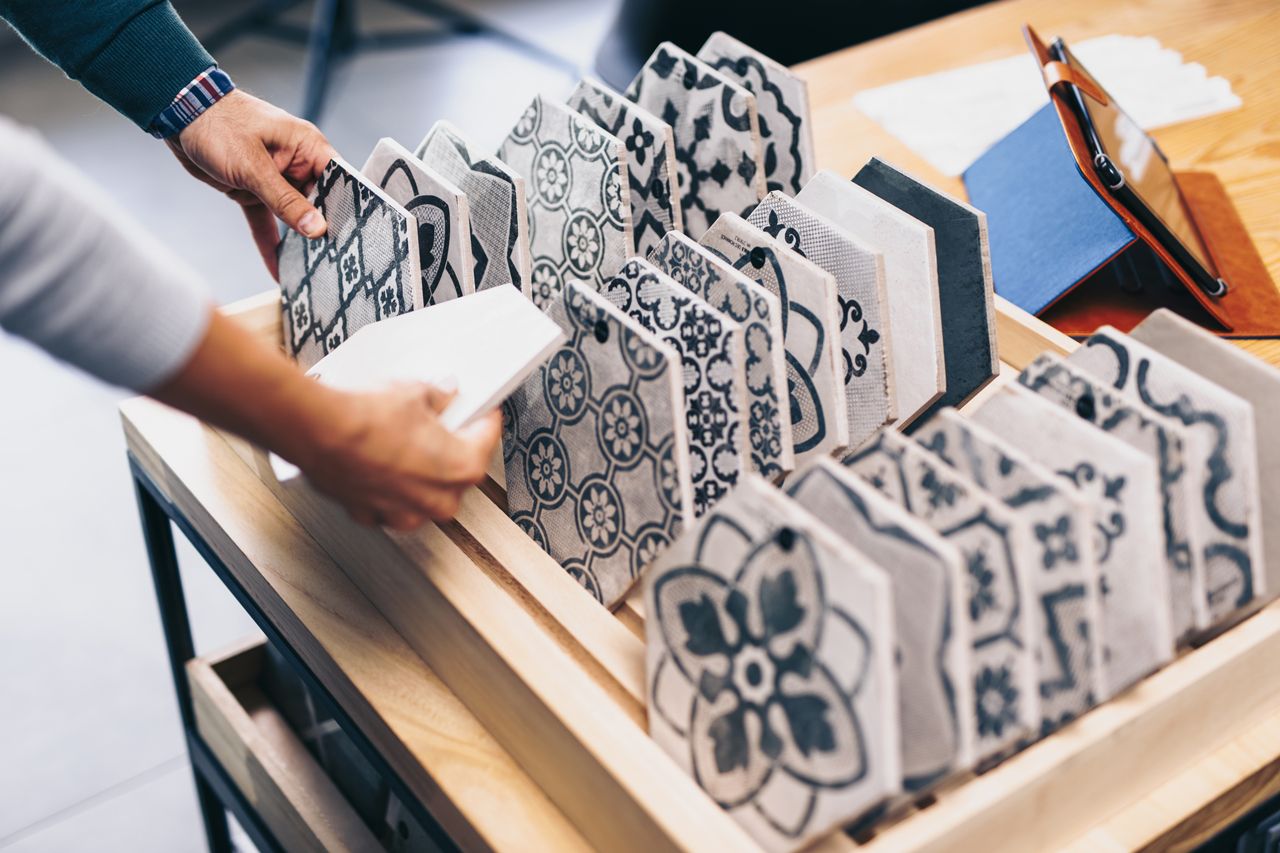
In the industrial manufacturing of ceramic tiles, surface glazing or decorating is usually done using one of the following methods:
Airless glazing: A spray gun positioned perpendicular to the passage of the tiles or plates pumps the glaze through tiny holes in a nozzle at a very high pressure to produce a smooth enamel layer.
Waterfall coating: The glaze cascades over the part like a curtain or waterfall as it passes through a machine.
Dry frit (granilla): A ceramic enamel prepared with different standardized granule sizes and applied:
- Dry over an organic solvent-based adhesive previously applied
- In a watery suspension within a medium mixed with a binder
Silkscreen printing (the use of this method has waned over time)
Rotary or laser etching (gravure)
Digital ink jet printing, today’s preferred decoration method.
Quality Control and Assurance Concerns in the Ceramics Manufacturing Industry
Before the ceramic product makes it to the consumer, quality checks help ensure that it meets the quality requirements. There are several points throughout the ceramics manufacturing process where flaws could be introduced into the product:
- Raw material problems, for example, the clay (which has been ground to a sand-like consistency) could be contaminated
- Pressing flaws, due to poor compaction or pressure distribution
- Uneven drying of unglazed tiles because of variations in humidity in the environment
- Glazing problems, including:
- Air bubbles during the enamel application, which produces pitting or pinholing flaws when a bubble breaks the surface
- Substrate bonding problems: cracks and crevices
- Contamination during glazing: e.g., dust
- Firing defects
- Underfired enamel/glaze: cracks due to an insufficient molten phase (sometimes related to cracks during glazing)
- Defective degassing: the firing of the base component generates gases that must pass through the molten glaze to make their way out of the tile; but sometimes this leaves bubbles entrapped
- Contamination in the enamel causing flaws such as colored dots or decomposition
Bubbles can pop up in different phases of the production process, resulting in aesthetic defects (when they break the surface) or cracking due to a lack of impermeability. These flaws are typically identified during the quality control phase, and the product is sent to the reject pile. It’s not always easy to find the cause but identifying the source of flaws is important so that corrective action can be taken to prevent the problem from reoccurring.
Digital Microscopes versus Conventional Stereo Microscopes for QC
Industrial microscopy is an inspection method that is used for quality control management of glazed ceramics. Conventional stereoscopes or microscopes (those with motorized and high-end features) connected to a camera and with additional software can provide ceramic manufacturers with most of the tools they require.
However, advances in microscope technology have led to digital microscopes, which are more versatile in terms of imaging functionalities, eliminating the need for a camera or its software. A digital microscope offers several capabilities that enable the quality inspector to gather the information required for proper flaw analysis and assessment.
Several Observation Method Options
Digital microscopes, such as the DSX1000 microscope, typically offer five or more observation methods, providing the inspector with several viewing options to thoroughly assess the flaw.
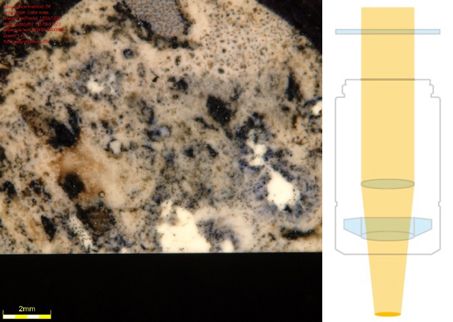
Darkfield: One of the most common microscopy methods due to its peripheral incident illumination. A benefit of this method is its accurate color representation. Usually, it is possible to segment the illumination to generate shadow effects and contrast on the sample.
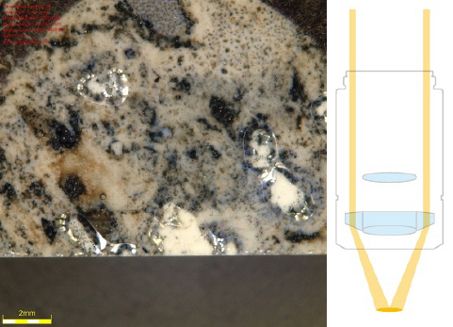
A glazed sample under darkfield observation (left) and a diagram of the light path (right)
Brightfield: Also knows as coaxial illumination, the brightfield technique consists of incident and reflected light from the sample that travels through the same optical path. The advantage of this technique is its high contrast power to distinguish voids and porosity pinholes in the enamel.
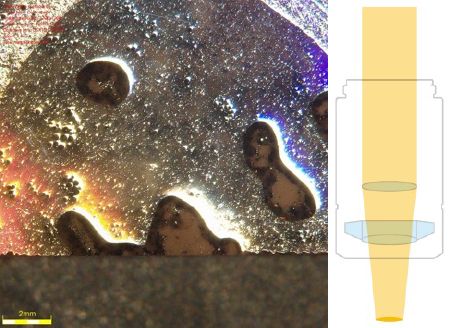
A glazed sample under a brightfield observation (left) and a diagram of the light path (right)
Oblique: A type of coaxial illumination where the sample is illuminated with only 50% of the optical path. This causes a 3D effect, which enhances defects and structures.

A glazed sample under oblique observation (left and middle) and the light path (right)
MIX: A combination of brightfield and darkfield illumination. MIX illumination is useful for reducing halation from shiny glazes.
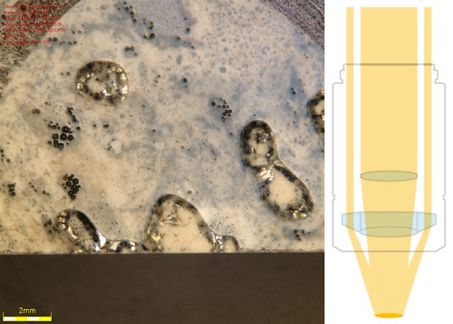
A glazed sample under MIX observation (left) and the diagram of the light path (right)
Polarized: A technique in which a set of polarizers is used to increase the brightness of the sample or to remove unwanted glare.
A glazed sample under polarized light observation (left) and the illumination path (right)
Choosing which observation option is best for your viewing needs is easy with the DSX1000 microscope thanks to its unique “best image” function. The system displays images of the sample using each illumination technique, and you click (or tap) the one that you prefer.
Watch the video below to see how it works:
Complementary Image Acquisition Techniques
Photography, namely 2D image acquisition, is traditionally used to document and analyze defects in ceramics. With a conventional optical system, this usually involves connecting a digital camera and its control software to the microscope. However, today’s digital microscope systems can acquire high-quality 2D and 3D images without any additional equipment required.
To complement 2D images, the DSX1000 microscope offers the possibility to select other types of image acquisition techniques:
Focal reconstruction: This technique builds a composite 2D image where only focal points of a sample appear. The following capture of a hole in a ceramic glaze is the result of Z-stacking images of different focal planes. The motorized focus axis of the DSX1000 system is part of what gives it the ability to make focal reconstructions.
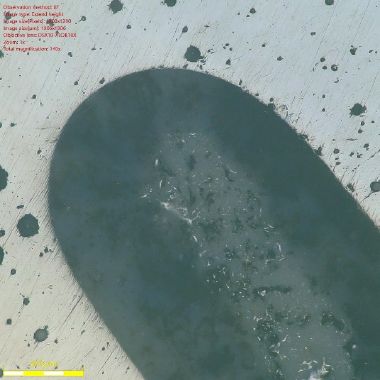
Hole in the glaze reconstructed using focal reconstruction
3D rendering: Based on a similar principle to focal reconstruction, 3D rendering results in a topographic image of the captured surface. This feature enables the QC inspector to thoroughly examine the severity and characteristics of a flaw.
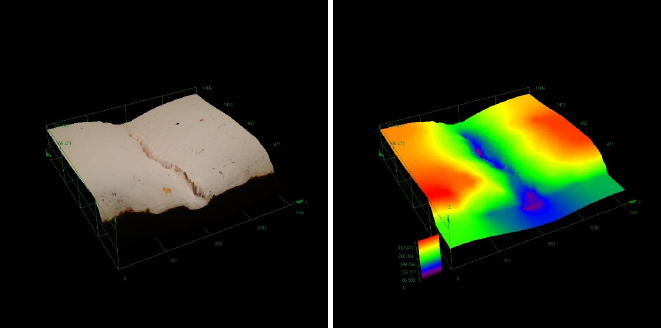
Topographic 3D image of a glazed surface with crevice
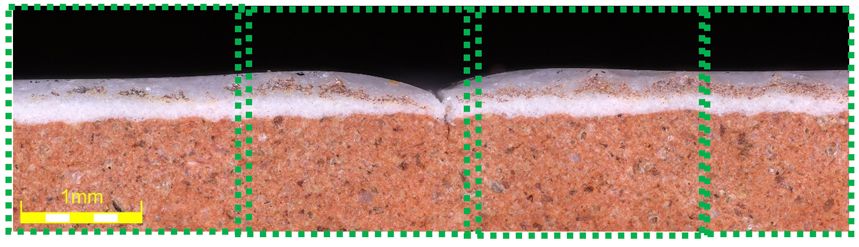
Panoramic image: A photocomposition in the XY axes. With the press of a button, the DSX1000 microscope can acquire images with a wide field of view and high-resolution by stitching several images together. It can even stitch 3D images to achieve a larger profile view.
Watch the video below to see a demonstration:
This image function can even be combined with focal reconstruction or 3D acquisition.
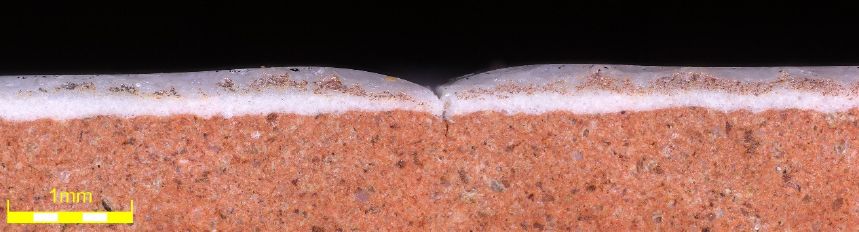
Panoramic image of a glazed ceramic (above); this image is the result of stitching together several overlapping images (sections shown below)
Advanced 2D and 3D Image Analysis Software
The software tools of the DSX1000 system offer advanced 2D and 3D image measurement and analysis, as well as automatic bubble detection and classification. When required, these features can accelerate the flaw assessment process for QC inspectors to keep up with production demands.
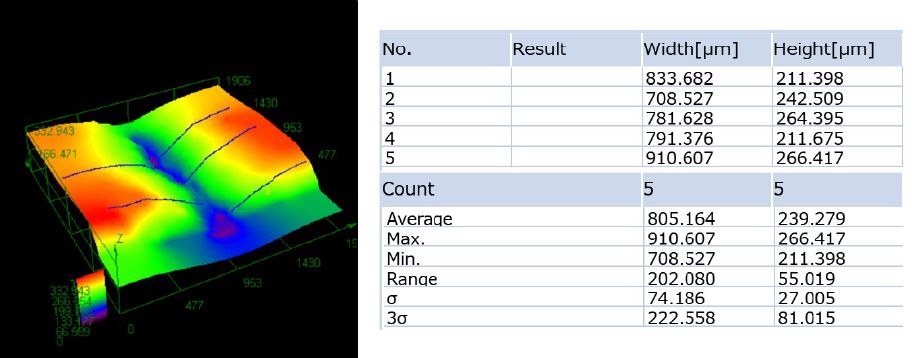
3D measurement of heights of the topographic profile
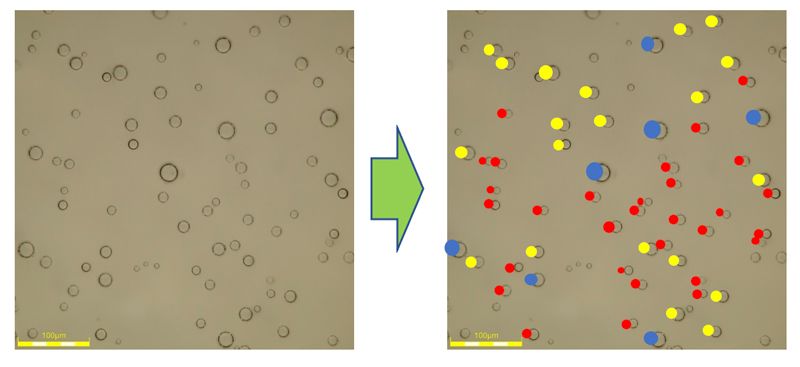
Automatic detection and classification of bubbles
Advantages of the DSX1000 Digital Microscope
As well as five or more observation methods, 2D and 3D image acquisition, and advanced imaging tools, the DSX1000 microscope’s features include:
- Long-life LED illumination
- Motorized optical zoom
- Wide range of objectives with different magnification and resolution possibilities
- High-capacity tilting frame (±90 degrees)
- Motorized Z-axis
- Mechanical or motorized XY stage
To learn more details about the DSX1000 digital microscope, visit www.olympus-ims.com/microscope/dsx/.
Related Content
DSX1000: Demonstration Various Observation Method with One Touch
DSX1000: Demonstration Guaranteed the Accuracy and Repeatability
5 Advantages of the DSX1000 Digital Microscope
Get In Touch