Phased Array Composite Inspection

Overview
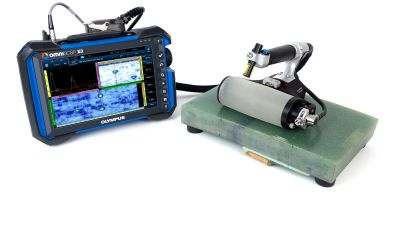
Our Phased Array Composite Inspection Solution provides a complete set of tools that simplify the inspection of composite parts, including skins, stringers, and spars. The Solution’s main components include: OmniScan® flaw detector, GLIDER™ scanner, RollerFORM® wheel probe, Mini-Wheel™ encoder, probes and wedges designed for composite part inspection.
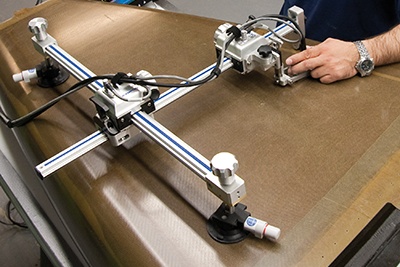
GLIDER Scanner
Semiautomated XY Mapping
High-Precision Inspection of Flat Panels
When performing complete mapping of large surfaces, the GLIDER™ scanner is used for accurate XY positioning during phased array (PA) or ultrasonic testing (UT) inspection.
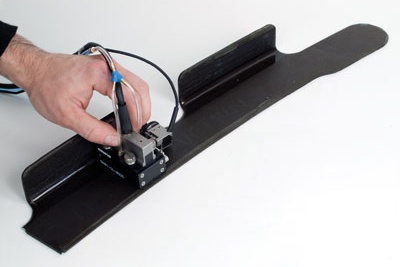
Mini-Wheel encoder
Manual Encoded One-Line Inspection
Small Footprint for Small Parts
For difficult-to-access areas, such as stringers or spars, the Mini-Wheel™ encoder can be attached directly to the probe to achieve a very small footprint.
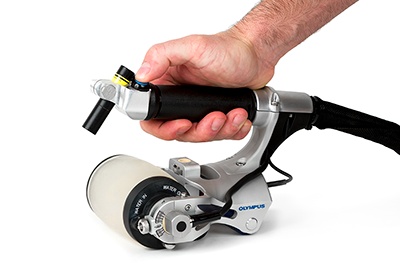
RollerFORM wheel probes
One-Line Encoding and Indexing Scanners
Ergonomic Inspection of Flat or Curved Surfaces
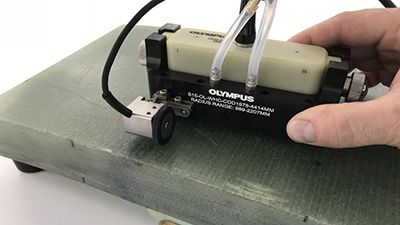
The RollerFORMTM wheel probe’s tire comes in two sizes and is made of a material that provides excellent coupling and closely matches the acoustic impedance of water to help provide high-quality data. The transparent tire and bubble trap make it easy to spot and clear air bubbles from the water chamber.
With an integrated indexing button, this ergonomic phased array scanner enables you to map the surface of a material by acquiring and combining multiple one-line, encoded C-scans. The built-in laser guide facilitates straight, precise one-line scans.
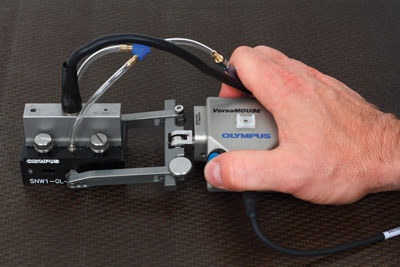
VersaMOUSE scanner
A Cost-Effective Inspection Solution for Flat Surfaces
When space is limited, the VersaMOUSE™ scanner is a cost-effective complement to the GLIDER scanner. Equipped with the same probe and Aqualene wedge commonly used with the GLIDER scanner, the VersaMOUSE scanner is capable of performing 2D mapping of small parts and areas. Features include:
- Integrated indexer button enables fast 2D mapping.
- Maximum wheel adherence.
- Easy probe installation using the adjustable yoke.
2D Mapping with Indexing Function
The VersaMOUSE and RollerFORM scanners have an integrated indexer button that makes 2D mapping as easy as clicking your thumb. Simply perform an encoded one-line scan and press the button to index the position in the perpendicular direction. When you perform the next one-line scan, it’s automatically juxtaposed to the previous scan in real time on the instrument’s display. Repeat this process to complete a 2D map of the area of interest.
Aqualene WedgeImmersion-Like Acoustics Aqualene is an elastomer couplant with an acoustic impedance similar to water. Aqualene wedges offer several benefits, including:
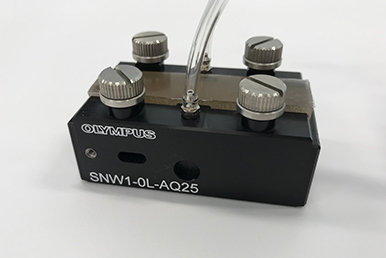
Aqualene wedges are available for NW1, NW2, and NW3 phased array probes, and they can be ordered with an optional water recuperation system for improved contact on irregular surfaces and minimum water loss. Aqualene Versus Rexolite Wedges Aqualene wedges reduce interface echo, contributing to up to 50% improvement in near-surface resolution. The result is that you can position the measurement gate closer to the interface. |
Wind Blade
Solving the Challenges of Wind Blade Inspection
The Olympus wind blade solution enables users to inspect blade spar caps and shear web bonding made with thick, attenuative materials, such as carbon fiber (CFRP) and glass fiber (GFRP). With wider coverage compared to conventional ultrasonic testing (UT), this phased array probe solution makes these challenging inspections easier with:
- Improved scan speed
- Increased data point density
- Reliable data
- Comprehensive, intuitive imaging
Easy-to-Implement Ergonomic ScanningRollerFORM™ XL Phased Array ScannerThe RollerFORM XL scanner is a wider version of the original and proven RollerFORM scanner, designed to address the challenges of large-component inspection. It is available with a 1 MHz phased array probe with larger elevation to provide improved signal performance on attenuative materials such as composites. Offering a more convenient approach to wind blade inspection, the RollerFORM XL scanner is ergonomic, easy to use, and requires only a mist of water to achieve good coupling. With its built-in start acquisition and clicker buttons as well as a laser guide, the RollerFORM XL scanner is capable of 2D mapping when combined with an OmniScan™ flaw detector. Other benefits of the kit include:
|
|
Intuitive Imaging for Spar Cap Inspection
Monitoring the integrity of spar cap material is important for manufacturers. As soon as a flaw is detected, they need to quickly adjust production parameters to help ensure the quality of the glass or carbon fiber materials.
The intuitive imaging provided by our phased array flaw detectors makes it easier for inspectors to detect:
- Delamination
- Wrinkles
- Porosity
- Disbonds
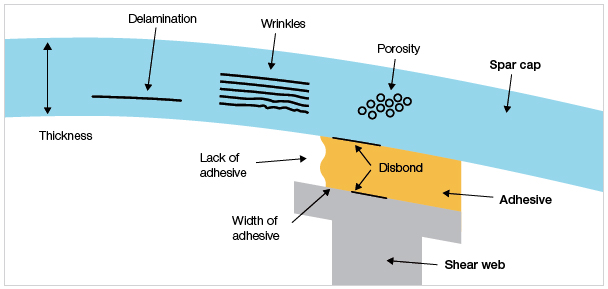 |
Typical defect types detected by phased array ultrasound |
Fast, Reliable Shear Web Bonding Inspection
Inspection of shear web bonding is critical for the long-term reliability of the blade. This phased array probe solution can travel along the blade or across it—use the Mini-Wheel™ encoder for manual one-line encoded scans or the GLIDER™ scanner for two-axis, semiautomated encoded scans.
The scans produce intuitive C-scan images that show the inspected area mapped with color-coded signal amplitude.
This solution makes it easier to identify bond quality and measure the width of a bond. At bonded zones, if the bond is good, the ultrasound travels through the adhesive and disperses into the shear web, resulting in weak echo at the bonded interface (represented in blue or yellow on the C-scan). In some applications, the corresponding A-scan can be used to measure the thickness of the adhesive.
The C-scan view is used to easily identify bond quality as well as measure the width of the bond. 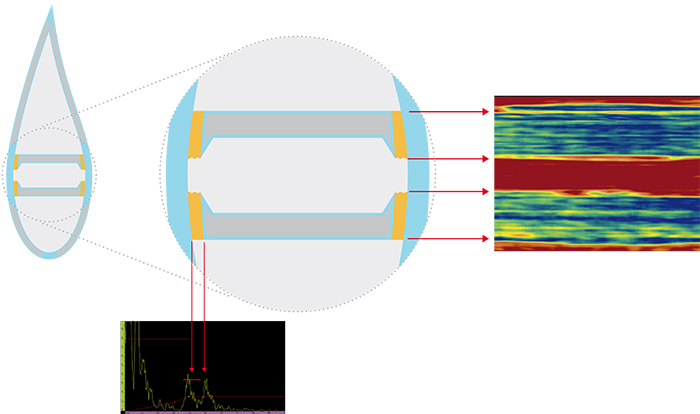 |
In this example, the A-scan can be used to measure the adhesive's thickness. |
Acquisition Performance
While the OmniScan flaw detector is the preferred instrument for manual or semiautomated inspection during manufacturing and in-service maintenance, the FOCUS PX™ acquisition unit can be used as part of a custom automated inspection system in manufacturing.
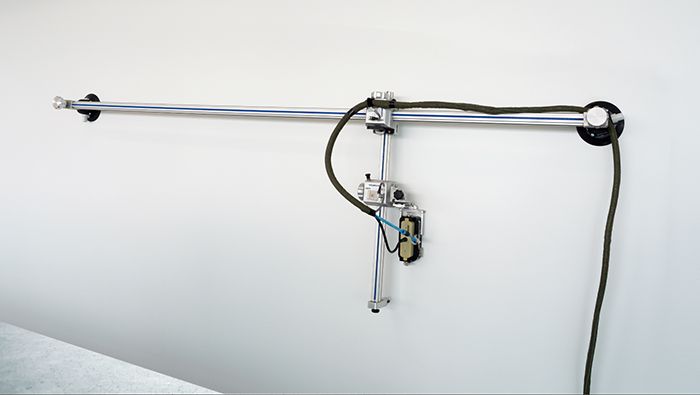 |
Semiautomated inspection using the 72-inch long GLIDER scanner and OmniScan flaw detector |
For conventional ultrasonic testing (UT) applications, holders are available that enable the M2008 probe to be used with the GLIDER™ scanner or the Mini-Wheel™ encoder.
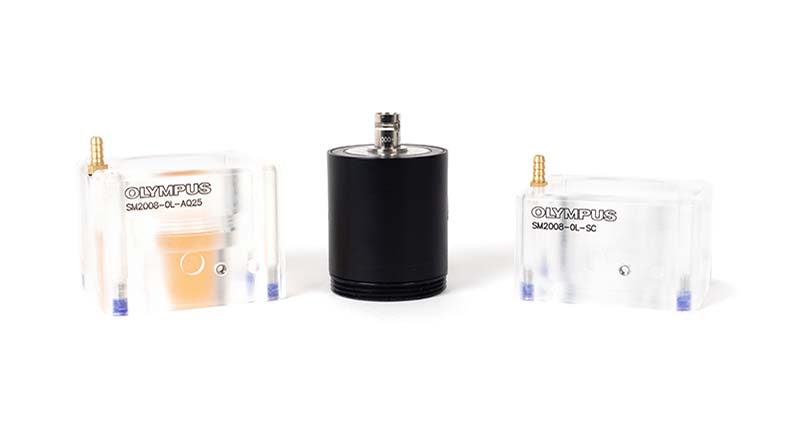 |
SM2008-0L-AQ25 (left). M2008 0.5 MHz probe (center). SM2008-0L-SC (right). |
Radii Inspection Solution
Radii Inspection Solution
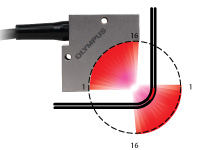
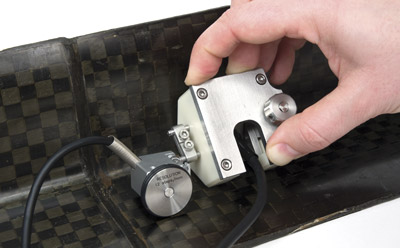
Our Phased Array Composite Inspection Solution for radii features holders and curved linear arrays that cover the entire corner in a single pass. The geometry of the probe enables all of the ultrasonic beams to coincide at 90° with the surface of the corner similar to flat-surface inspection. The inspection is performed in water immersion, either from the inside or from the outside of the radii, depending on the shape and size.
