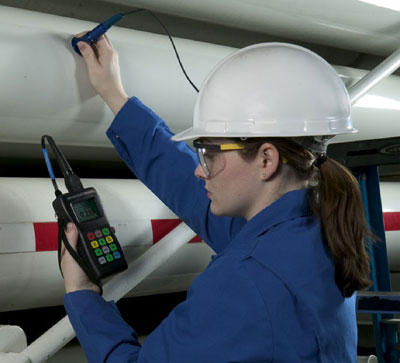
This application note explores how to accurately measure remaining wall thickness of metal pipes, tanks, beams, ship hulls, and other structures through paint and similar coatings.
The Challenges of Measuring Metal Thickness through Paint or Coatings
In many industrial and petrochemical maintenance situations, it is necessary to measure the remaining thickness of metal that is subject to corrosion through one or more coats of paint or similar nonmetallic coatings. With conventional ultrasonic thickness gauges, the presence of paint or similar coatings will cause measurement errors, typically increasing the apparent metal thickness by more than twice the thickness of the paint, due to the paint's much slower sound velocity. Two solutions to this problem are available: echo-to-echo measurement and THRU-COAT™ measurement. |
|
Equipment Used for Echo-to-Echo and THRU-COAT Measurement
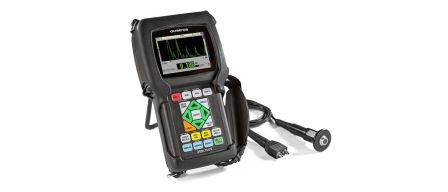
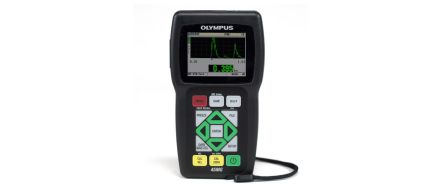
Echo-to-echo and THRU-COAT capability is available on two of our corrosion gauges: the 39DL PLUS™ and 45MG gauges. Echo-to-echo measurement is usually performed with one of the following dual element transducers: D790, D791, D797, or D798. THRU-COAT measurement requires one of two specialized dual element transducers, a D7906-SM or a D7908.
Dual element transducers have long been the industry standard for corrosion survey applications due to their superior response to rough surfaces and pitting conditions. They are normally recommended for all common corrosion gauging applications. Single element delay line transducers may be recommended in certain applications involving smooth painted metal where higher measurement precision is required.
Theory of Operation for Measuring Metal Thickness through Paint
Longitudinal wave sound velocity in steel is typically around 5,900 m/s (0.2320 in./µs), while sound velocity in paint and similar coatings is normally less than 2,500 m/s (0.1000 in/µs). A conventional ultrasonic gauge that measures the total thickness of painted metal will erroneously measure the paint layer at the velocity of steel, meaning that the paint will appear to be at least 2.35 times thicker (the ratio of the two sound velocities) than it actually is. In situations involving thick coatings and close tolerances, the error introduced by the paint layer can be a significant part of the total measurement. The solution to this problem is to measure or calculate thickness in such a way that the paint component is removed from the measurement.
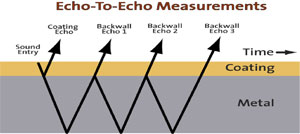
Echo-to-echo thickness measurement simply involves the well-established technique of timing the interval between two successive back wall echoes that represent successive round trips of the sound wave through the test material. In situations involving painted metal, these multiple back wall echoes occur only within the metal, not in the coating, so the interval between any pair of them (back wall echo 1 to 2, back wall echo 2 to 3, etc.) represents metal thickness only with the coating thickness cancelled out.

THRU-COAT measurement involves using a patented software approach to identify the time interval represented by one round trip in the coating. That time interval is used to calculate and display the coating thickness. By subtracting that interval from the total measurement, the gauge can also calculate and display the metal substrate thickness.
Comparing Echo-to-Echo and THRU-COAT Measurement Techniques
Each of these techniques has advantages and limitations that should be considered in selecting which is best for a given application:
Echo-to-echo advantages:
- Works with a variety of common transducers
- Often works through rough-surfaced coatings
- Can be performed at high temperatures up to approximately 500 °C or 930 °F with appropriate transducers
Echo-to echo limitations:
- Requires multiple back wall echoes, which may not exist in severely corroded metals
- Thickness range may be more limited than with THRU-COAT measurement
THRU-COAT advantages:
- Works over a wide range of metal thicknesses, typically from 1 mm (0.040 in.) to greater than 50 mm (2 in.) in steel
- Requires only one back wall echo
- May measure minimum remaining metal thickness more accurately in pitting situations
THRU-COAT limitations:
- Coating must be nonmetallic and at least 0.125 mm (0.005 in.) thick
- Coating surface must be relatively smooth
- Requires using one of two specialized transducers
- Maximum surface temperature is approximately 50 °C or 125 °F
Procedure for Echo-to-Echo and THRU-COAT Measurements
The procedures for activating and performing echo-to-echo and THRU-COAT measurements with the 39DL PLUS and 45MG gauges and appropriate transducers are described in detail in their respective operating manuals. Please refer to the gauge manuals for that information and for details on the recommended procedure for velocity calibration and for gain and blanking optimization where necessary.
Range of Measurement for THRU-COAT Mode
The THRU-COAT feature using D7906-SM or D7908 transducers can measure only nonmetallic coatings, such as paint or epoxy that are 0.12 mm (0.005 in.) or greater in thickness. If you are measuring coated steel and a value for the coating is not displayed, the coating thickness is below the minimum thickness reading capability of the THRU-COAT feature or cannot be otherwise resolved by the feature. In many cases, the thickness of the coating will still be subtracted from measurement and the thickness of the steel will be displayed. You may also attempt the measurement using the echo-to-echo feature, or it may be necessary to remove the coating.
The measurable metal thickness in THRU-COAT mode typically ranges from approximately 1 mm (0.040 in.) to greater than 50 mm (2 in.), depending on the acoustic properties of the metal and the interior surface condition.
Range of Measurement for Echo-to-Echo Mode
In echo-to-echo mode, the range of thickness depends on transducer selection and the type of gauge being used, as well as the acoustic properties of the metal being measured and the surface condition. By definition, echo-to-echo measurement requires the presence of at least two backwall echoes, so it will not work in certain extreme situations involving severely corroded, very rough, highly scattering, or highly attenuating materials that do not support a second multiple backwall echo. In such cases, THRU-COAT measurement should be used if possible.
With the 39DL PLUS and 45MG gauges, typical echo-to-echo thickness ranges are as follows:
| Transducer Type | Thickness Range* |
| D798 | 0.06 in. to 0.3 in. (1.5 mm to 7.50 mm) |
| D790/D791 | 0.1 in. to 2 in. (2 mm to 50 mm) |
| D797 | 0.5 in. to 5 in. (12.5 mm to 125 mm) |
| M201 | 0.05 in. to 0.5 in. (1.25 mm to 12.5 mm) |
*Thickness ranges are dependent on the material, surface condition, and temperature.


