Keeping your OmniScan™ X3 and OmniPC™ software up to date always has advantages. We’re continually improving the software features and providing new functionalities to enhance your inspection workflow—from set up to analysis.
By now, if you’re an OmniScan X3 owner, you’ve hopefully already updated your software to MXU 5.16, the latest release. Whenever a new version is available, in addition to reaching out to users directly, we spread the word on social media. Following Evident Industrial is a good way to make sure you see the announcement.
What’s New in the Latest Version of MXU?
With each update, our OmniScan team typically produces a “What’s New in MXU” video to summarize the improvement highlights. A video for the 5.16 release is in the works.
In the meantime, watch “What’s New in MXU 5.14 and 5.15, the OmniScan™ X3 Onboard Software” here.
This blog post delves into the 5.15 and 5.16 updates of the OmniScan X3 onboard software. For an overview of the workflow improvements—divided according to their advantages for weld and corrosion inspection applications—read on!
Optimized for Corrosion Monitoring with the HydroFORM™ Scanner
Here are six ways that MXU 5.15 and 5.16 make the OmniScan X3 flaw detector more convenient to use with a HydroFORM scanner for corrosion inspection:
1. Easy part setup and orientation of the inspection area
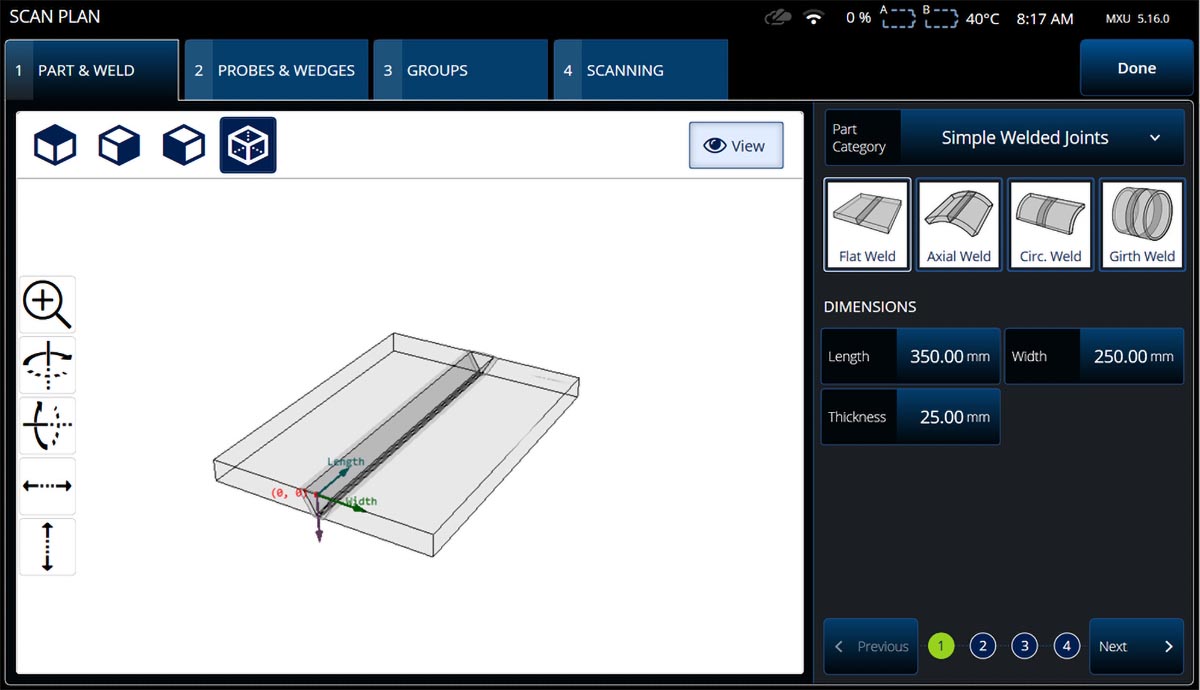
Starting with the Part & Weld tab in the scan plan wizard, you can easily define the parameters of parts with simple geometry and without a weld. The 3D representation offers you a clear visual reference of the parts’ dimensions as you define the length and width of the area of the part.
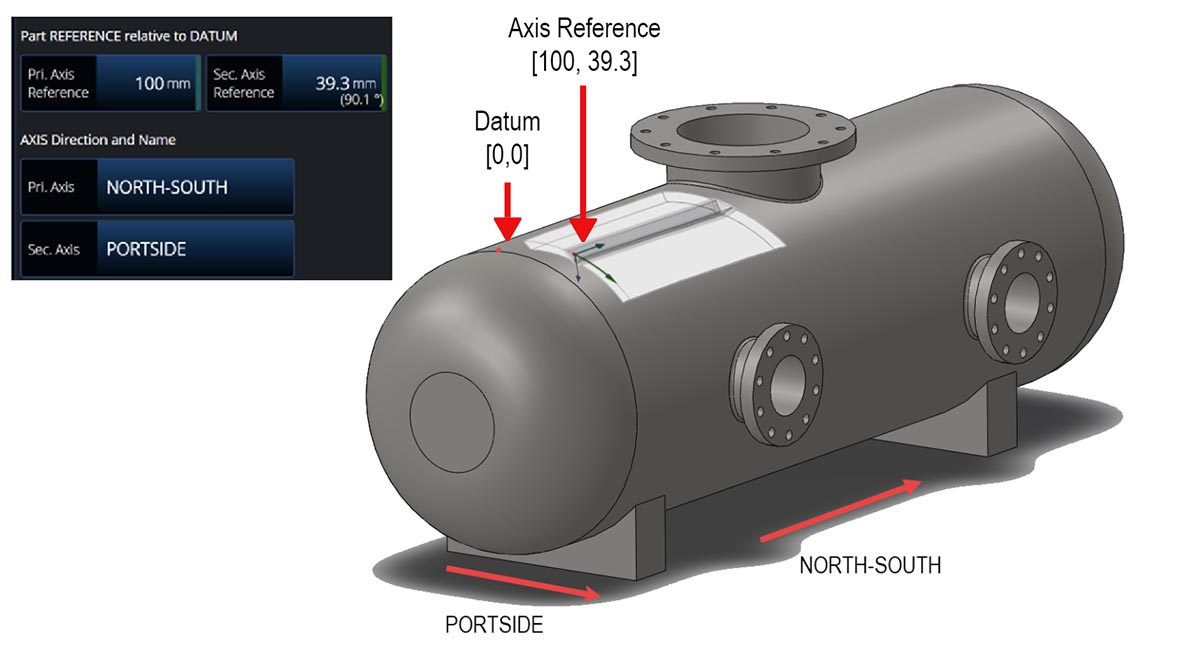
To help you orient the inspected area within the overall asset, you can also enter the distance of the scanning origin to the asset’s datum position defined on your schematic. To further assist you in positioning your inspection area within the asset, MXU enables you to customize the names of the scanning axes to real-world references.

2. Automatic detection of the HydroFORM probe
When you connect the HydroFORM scanner and press Detect probe, the OmniScan X3 software autofills the probe model (the I8 series for next-generation HydroFORM scanners) and then proposes a list of the compatible wedges (HydroFORM SI8, by default). This greatly eases setting up your scan plan on the Probes & Wedges tab. All the necessary probe and wedge specifications are provided.
No longer needing to verify which model is in the scanner or to manually enter each spec saves you precious setup time. You also avoid inadvertently entering an incorrect parameter, which could affect the accuracy of your set up.
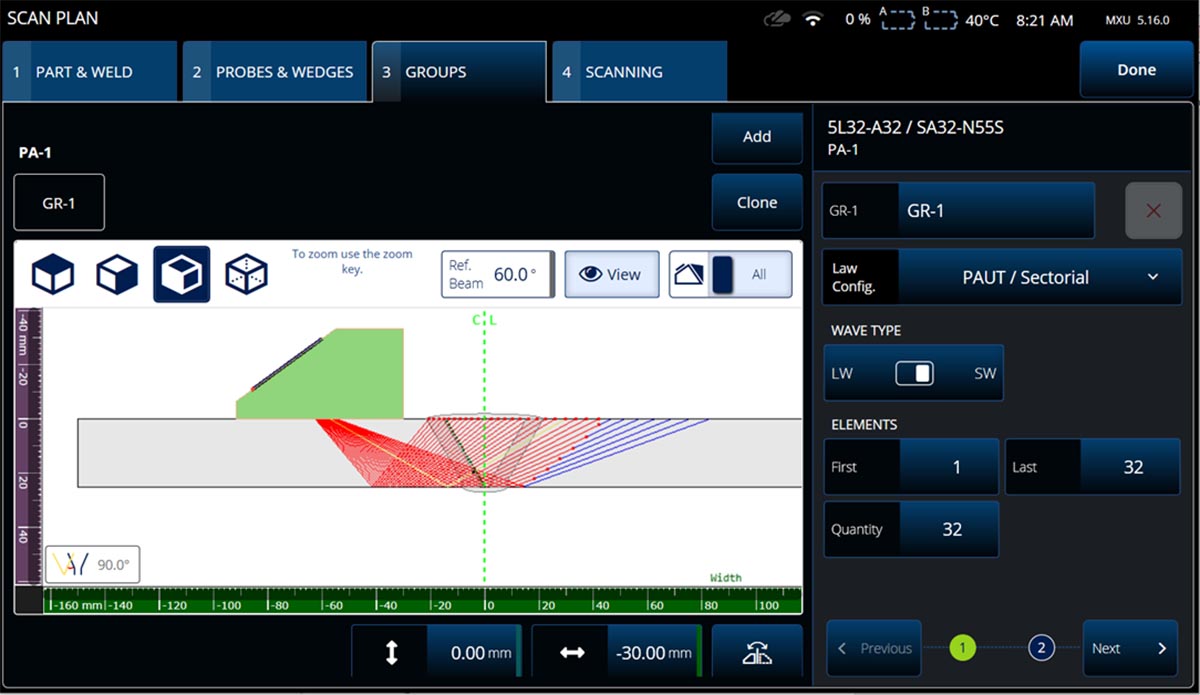
3. Focal law configuration improvements for 0° with Overlap mode
For phased array probes such as the HydroFORM I8 series, the 0° with Overlap law configuration mode is very handy. Selecting this mode on the Groups tab fixes the first element to the edge of the part, representing the true physical characteristics.
When setting your group for a next-gen HydroFORM configuration, since the elevation is thinner, make sure to set your aperture (Quantity) to around 4–6 elements.

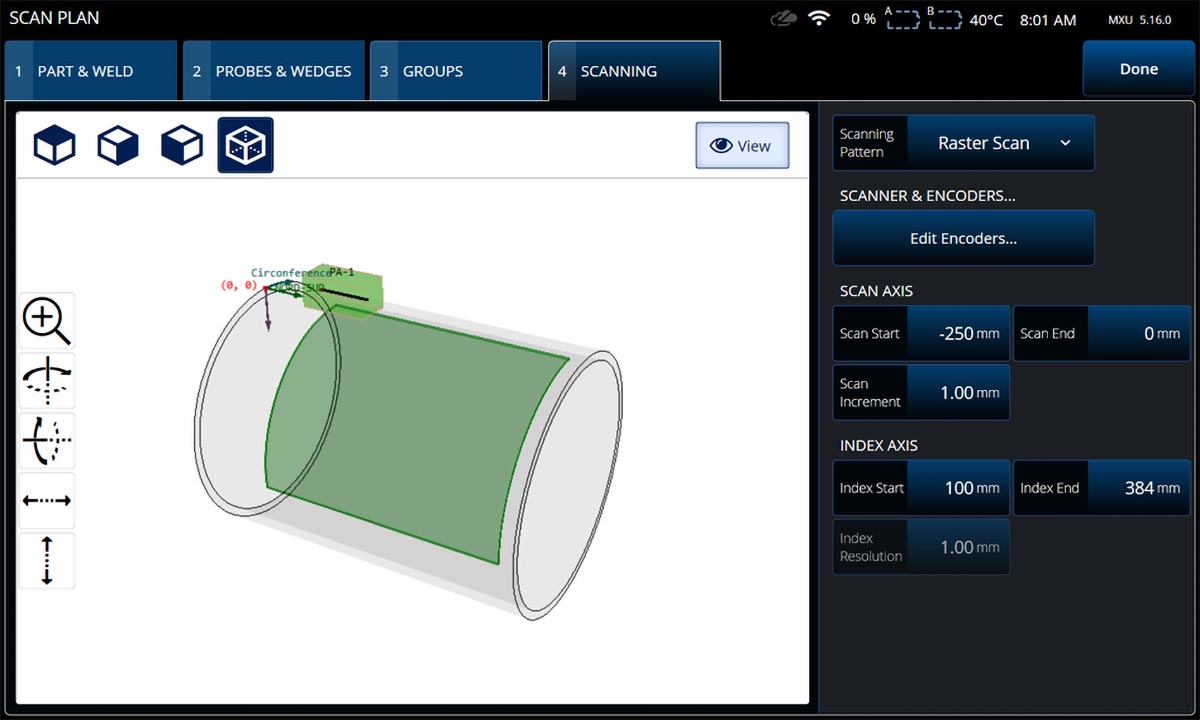
4. Direct access to scanning parameters in the scan plan on the Scanning tab
Setting your scanning parameters is more convenient and faster as you can now access them all directly in the Scan Plan wizard. On the new Scanning tab, select your scanner (Edit Encoders…) and define the scanning distances for both scan axes, and the 3D representation updates dynamically.
5. Index axis orientation can be switched
To reflect the real-world scanning pattern on the inspected part, you can change the orientation of the index axis in the scan plan. The C-Scan Axes button switches the orientation of the index axis in the C-scan, matching the index axes of the C-scan and S-scan (for linear 0° scans). Changing the index axis orientation in this way makes data interpretation much more intuitive.
It’s a practical feature for scanning components when you are constrained by the shape or position of the piece and need to move in a different pattern than the default orientation.
6. Scan speed warning on the ScanDeck™ module
Through two-way communication between the HydroFORM scanner and the OmniScan X3 software, the LED light on the ScanDeck™ module alerts you when the scanning speed exceeds the maximum acquisition speed. Maintaining the optimal scanning speed helps ensure that no data is missed, so you can avoid the need to rescan and improve your overall data quality.
Faster and Easier Scan Plan for PAUT Weld Inspection
Achieving an optimal configuration for phased array inspection of welds is also easier with your OmniScan X3 scan plan thanks to these four main improvements:
1. Near field visualization in the scan plan modeling tool
For sectorial, linear, and compound group configuration of dual and linear PA probes, you can now toggle on the Near-Field Display. This tool provides a clear visual reference of the probe’s focusing capacity, and it changes dynamically as you adjust the probe and wedge combination and the law configuration parameters on the Groups tab.
Achieving an optimal probe and wedge combination and configuring the probe parameters—such as the index, element quantity, first element, and start and end angles—is much simpler. Configure all your focal law directly in the OmniScan X3 scan plan and avoid using third-party software to prepare and import your setup files in advance.
2. Reference beam display showing bevel incident angle
Another practical scan plan tool is the Ref. Beam Display. Turn it on to confidently validate the code compliance of the beam incident angle to the weld bevel. The reference beam is highlighted in yellow on the beam simulation model, and the angle of incidence value is also provided.
Having this information enables you to accurately determine the refracted angle and the bevel incident angle and make any necessary adjustments to achieved optimal, code-compliant results the first time.
3. New tools to speed up and optimize your TCG calibration
As of MXU 5.16, the PAUT weld calibration for the time-corrected gain (TCG) has two new features to make the process more convenient and efficient:
- When you set the Index Start and Index End parameters, the dotted lines (the index limiters) move in real-time on the S-scan view, so you can isolate the area of interest for the TCG calibration. This eliminates the need to perform a TCG calibration for individual and irrelevant angles, saving time and simplifying the process for dual and linear phased array probes.
- Since inspection codes only require calibration inside the welded zone, the new weld overlay in the S-scan enables you to quickly identify the area of interest and to validate the optimal depth to be used for the calibration.
4. Powerful autodetection of all Evident PA probes including custom models
Benefiting weld applications as well as corrosion inspections, the probe autodetection function accelerates the setup for any configuration involving an Evident probe. It works for off-the-shelf models as well as custom probes.
When you connect the probe and press the Detect probe button, the software provides all required probe specifications, eliminating the time-consuming process of entering them manually. If it’s a custom probe, the software proposes the closest match, and then you can make the necessary adjustments to the specs, still saving you a considerable amount of time.
Probe autodetection also helps ensure the quality of your inspection, since it prevents you from entering any incorrect probe parameters that could result in errors in the beam modeling projections.
That concludes this overview of the MXU 5.15 and 5.16 improvements. Keep an eye out for the next update. With MXU 5.17, we’re further enhancing and streamlining the scan plan workflow in some significant and helpful ways. So, stay tuned!
For any questions or inquiries about the OmniScan product line, don’t hesitate to get in touch with us.
Related Content
Advantageous Applications for Phase Coherence Imaging (PCI)
A Day in the Life of an Offshore Inspector and the HydroFORM™ Phased Array Scanner