One OmniScan® X3 flaw detector feature that our customers love is the onboard scan plan tool. While the steps required to set up your flaw detector for an inspection are familiar to any OmniScan user, this tool presents these well-known steps—Part and Weld, Probes and Wedges, and Groups—in a more visual way, making the process easier. And you can build your plan directly on your instrument without having to use a PC. Here are 3 ways the scan plan tool simplifies your set up. |  |
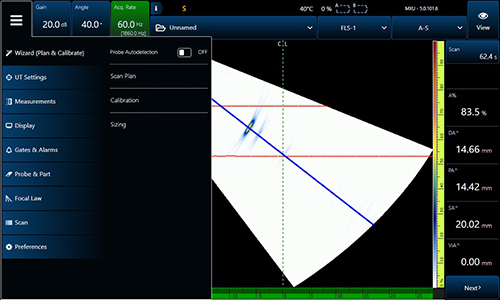
OmniScan X3 main menu
1. Create your part and weld geometry in a few easy steps
The Part & Weld wizard groups together all the required information about the piece you’re going to inspect. Select your material from the list and view your recently used materials in the history panel. Choose the part type from plate, tube, or bar and enter the specifications and the weld definition in a clear visualization tool.
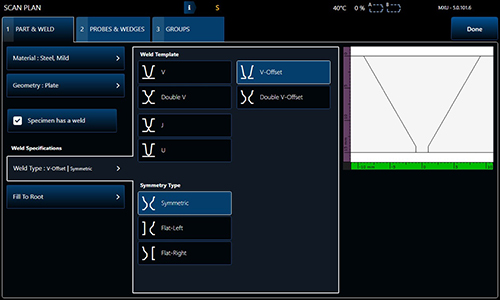
The Part and Weld section of the scan plan tool
2. Setting up your probes and wedges is simple
Next, select the probes and wedges for your inspection. Choose the probe type, and then select the probe model and wedge model from the onboard library. Then, set up the pulser and receiver connection and use the visualization screen to help position the probes and wedges on the part.
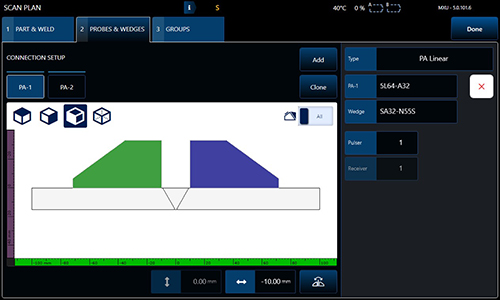
The Probes and Wedges section of the scan plan tool
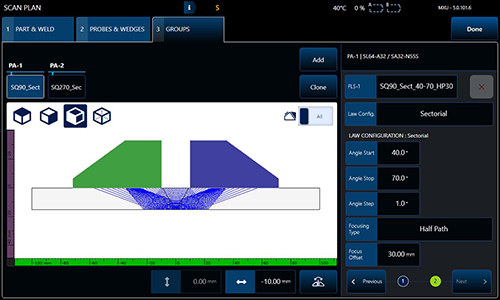
3. Generate all your groups on one screen
In this final step, set up all the groups and link them to the probe and wedge. Name the groups and choose the law configuration—sectorial, linear, compound, or TFM. Input each group’s parameters, including the elements, angles, and type of focusing. When you’re done, exit the scan plan wizard, and your setup is complete.

The Groups section of the scan plan tool
With your setup complete, you’re ready to begin an inspection
From creating the part being inspected to adding the correct probe and wedge to configuring the focal laws, the scan plan tool makes setting up your inspection easier. Additional features include probe and group cloning to save you time and dual matrix and dual linear array focal law setup to support a variety of inspections.
Related Content
Top 3 FMC/TFM Enhancements of the New OmniScan X3 Flaw Detector Explained
5 Reasons to Make the Switch to the OmniScan® X3 Flaw Detector
Get In Touch