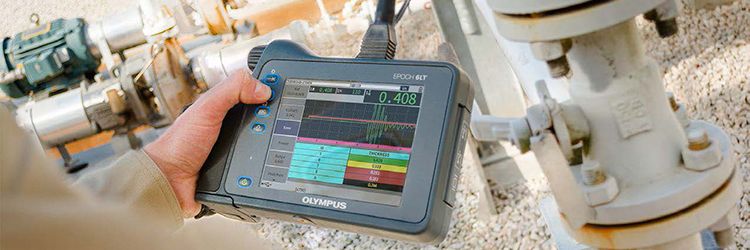
The corrosion module software for the EPOCH® 6LT ultrasonic flaw detector combines the key functionality of a corrosion gage and a flaw detector to make your corrosion inspections faster and more efficient.
Many rope access NDT inspectors use an ultrasonic (UT) instrument for their flaw detection and corrosion inspections. The reason is that the echo dynamics and gain linearity of a UT flaw detector are particularly useful when scanning a part for defects. However, if you’re using a conventional UT flaw detector, you need to stop every time you find a potentially corroded area and reconfigure your instrument to try to record precise measurements of the remaining part thickness. Some inspectors even choose to bring both a flaw detector and a thickness
There’s now an easier way to perform efficient and precise UT corrosion inspections. The EPOCH 6LT flaw detector’s corrosion module is a cost-effective solution that improves your corrosion inspections in 7 ways.
- Less equipment to carry
No one wants to lug around more equipment than necessary, and this is especially true if you’re hanging from a rope while doing your inspections. The corrosion module combines the key functionality of a corrosion gage and a flaw detector, so you can feel confident bringing just one lightweight instrument with you to the job site. You can scan for and locate defects in flaw detection mode, and then switch to corrosion mode with the push of a button to take precise, reproducible thickness measurements. - Quick and easy setups with our corrosion dual transducers
Save time on the job site with automatic probe recognition software. The corrosion module enables the EPOCH 6LT flaw detector to use the center pin ID technology popularized by Olympus thickness gages to identify which probe is connected and automatically load the appropriate settings. Simply plug in a supported probe, and the pulser and receiver settings will be automatically configured. All standard Olympus corrosion dual transducers are supported! - Fast and accurate wear compensation
Dual transducers use a plastic tip to protect the elements from damage and improve near-surface resolution. Depending on how the transducer is used, the plastic delay can wear down, altering the amount of time it takes ultrasound to travel from the pulsing element to the test material and back to the receiving element. Variations in temperature and other factors can further alter the time of flight through the transducer and delay line material, resulting in an inaccurate measurement. By simply pressing a button, the corrosion module uses two pulsing channels to measure the offset from each dual transducer element, resulting in greater measurement accuracy. - Accurate measurements with dual transducers
One of the reasons we recommend using dual element transducers for corrosion inspections is that the transducer elements are set at a slight inward angle. This angle focuses the sound into a V-shaped sound path and improves the signal response on rough or corroded material. The potential drawback of this ‘V-path’ is that conventional flaw detectors don’t account for the slightly longer sound path. The corrosion module features V-path correction, which compensates for the angled sound path and results in more accurate measurements. - More efficient workflow
When taking thickness measurements with a flaw detector, you need to constantly adjust the receiver gain level so that the gated signal maintains a vertical leading edge to ensure accurate results. The corrosion module’s automatic gain control feature optimizes the gain level, enabling you to quickly record accurate thickness measurements. - Precise measurements, regardless of surface conditions
Conventional flaw detectors typically use edge or peak gate detection modes, which measure thickness from the leading edge or peak of the first echo to cross the gate, respectively. While these measurement modes are well-suited for detecting small defects, they are susceptible to measurement variations from changes in signal amplitude. The corrosion module uses the same zero-cross measurement algorithm as Olympus thickness gages, for consistent and precise thickness measurements. - Immediate visual feedback and organized results
The EPOCH 6LT flaw detector with the corrosion module features a grid view, which enables you to save thickness readings into a grid. The grid can be color-coded to provide instant visual feedback to help you interpret your results in real time. Simply set an acceptable measurement range, and your thickness measurements will be instantly categorized based on the inspection criteria.
Related Content
Rope Access on the Rise: Hanging Out with the EPOCH 6LT Flaw Detector
Video: EPOCH 6LT Flaw Detector for Rope Access Technicians
Corrosion Gaging with Dual Element Transducers
Get In Touch
